
Brand atmosphere: a street by the sea, suggesting preparation before departure. Not a destination photograph.

From preparation to the end of commentary.

Four stages for a guide’s day.

Brand atmosphere: a warm street and coast, suggesting preparation before departure. Not a destination photograph.

Before you leave, confirm who you are and which tour you lead.

Finish your Guide identity and confirm today’s tour before you leave. You do not turn on Tour Companion yet, and you do not show a QR to travelers.

The backgrounds are brand atmosphere, not licensed destination photography, and they do not represent a real tour.

Step 1 / 4

First time: scan the Guide activation QR

The first time, scan the Guide activation QR from your agency on the opening screen. The QR must be valid, unused and unexpired. The phone needs a connection so the App can verify it.

The most important point in this step

This QR only activates your Guide identity. It does not create a tour assignment. Do not give it to travelers. The screen below is only the scan entry, not a completed activation.
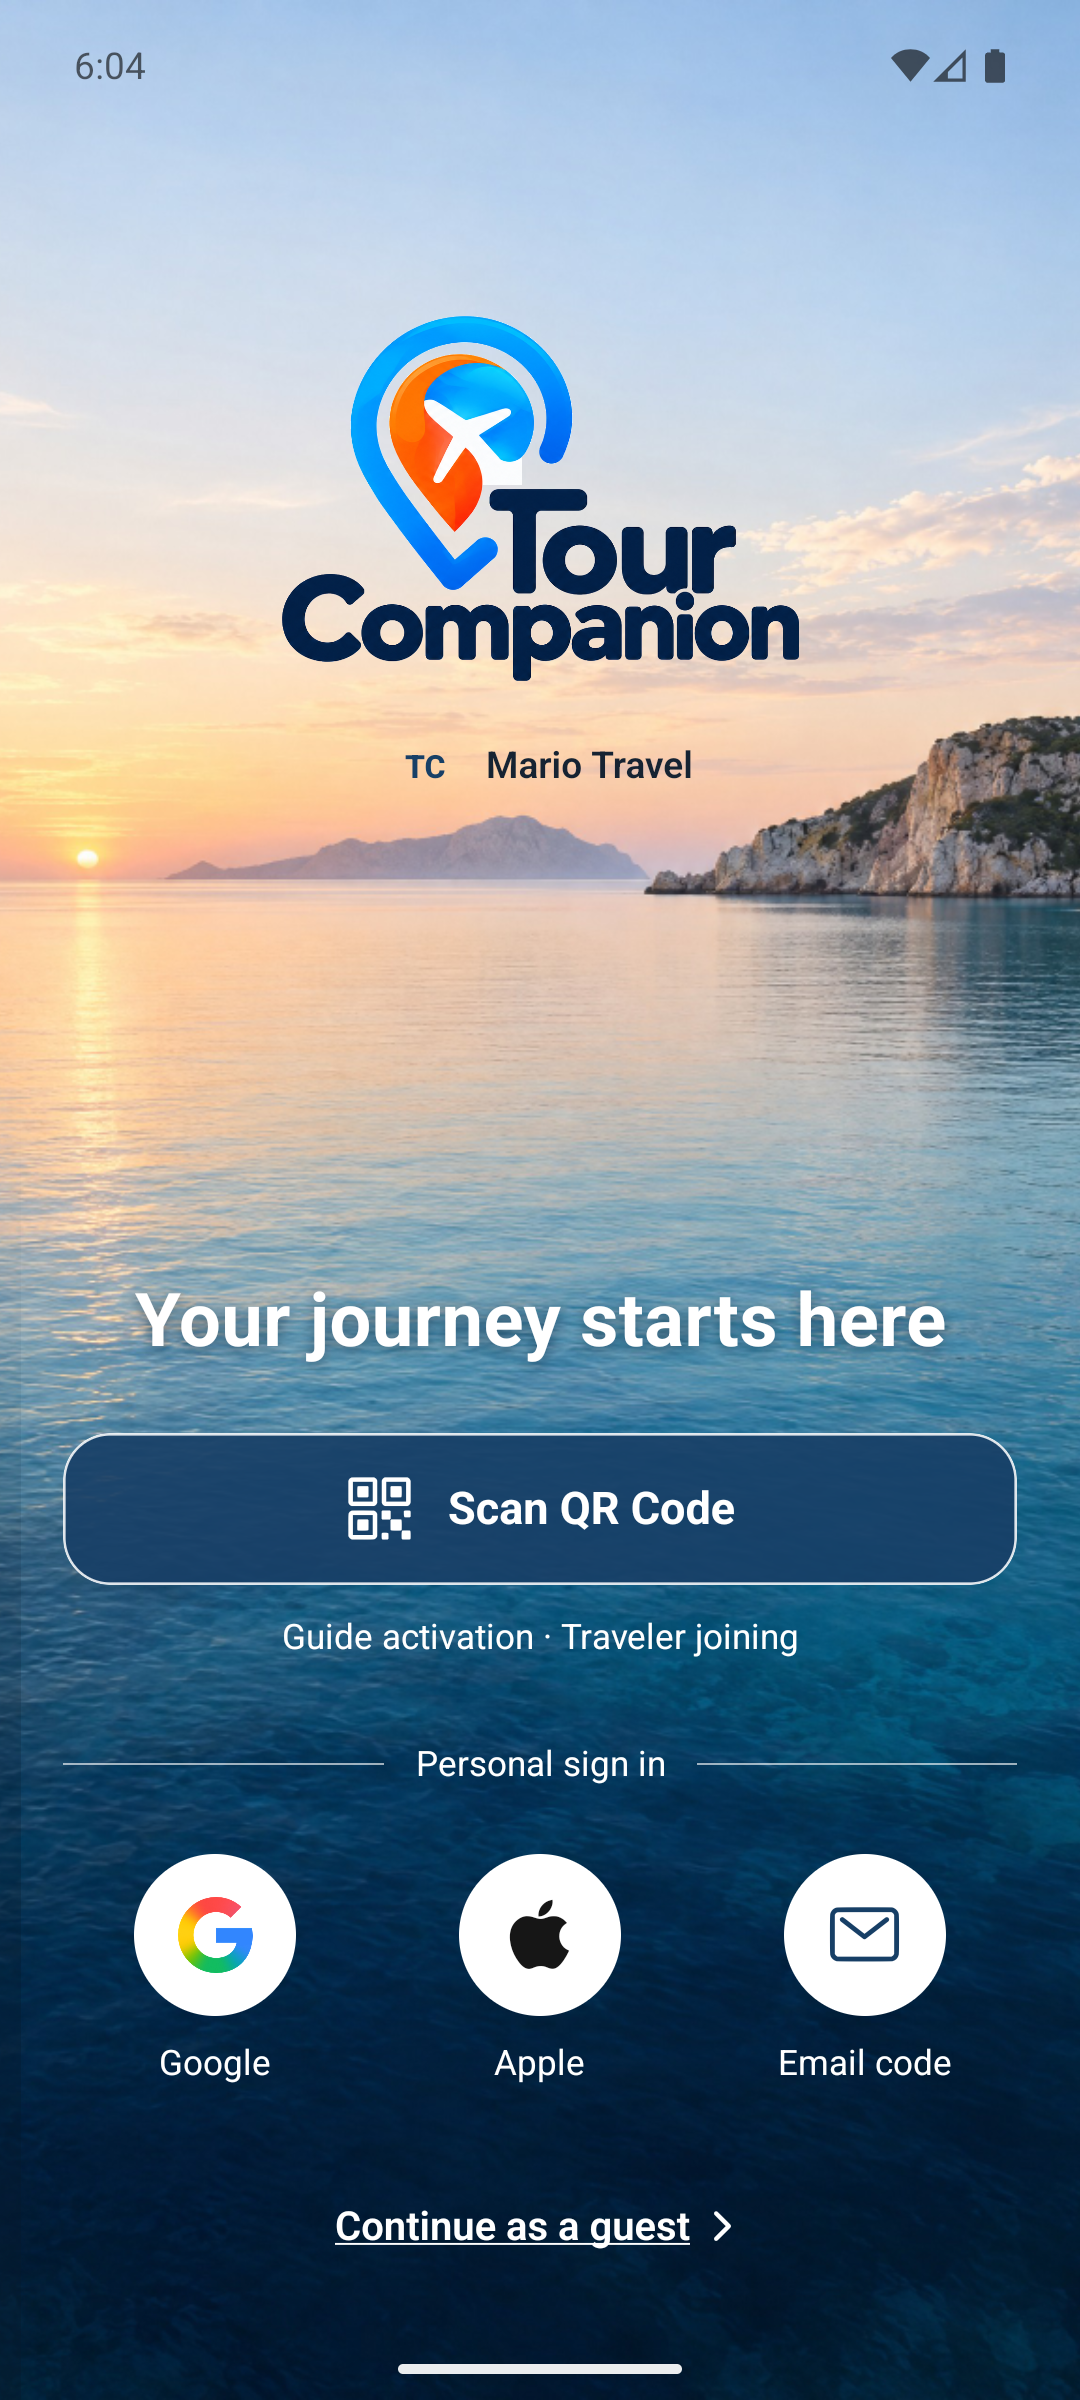

Shared welcome entry
Actual App emulator screenshot · confirms the entry point only. Mario Travel is built-in demonstration co-branding, not a customer endorsement.The opening screen mentions both Guide activation and traveler joining. This step uses only the Guide activation QR. It is not traveler sign-in, and it is not a completed activation.

Step 2 / 4

An activated phone restores your identity

If this phone is already activated, opening the App restores the existing Guide session. You do not scan the activation QR again.

The most important point in this step

Only the first activation needs an online check. If the identity does not return, ask the agency whether the QR is still valid.

How it works

  • Saved Guide identity
  • No second scan
  • Online check on first activation

Step 3 / 4

Open your assigned tour

On Me, look at the tours assigned to you. One tour is selected automatically. With more than one, choose the tour you are leading today. Choosing a tour does not start pairing or commentary.

The most important point in this step

If you see “No active tour assignment. Contact your agency.”, contact the agency. Do not type a tour number yourself.

How it works

  • One tour: selected for you
  • Several tours: you choose
  • No assignment: contact the agency

Step 4 / 4

A personal account is not Guide eligibility

Signing in with a personal account does not by itself make you a guide. If your verified email qualifies at more than one agency, the App asks you to “Choose your agency”.

The most important point in this step

Confirm your identity, then look at assignments. Choosing an agency does not create a tour when none has been assigned.

How it works · not an actual App screenPersonal sign-inChoose your agencyConfirm the assignment
Brand atmosphere: coast and distant hills, suggesting the moment after pairing. Not a route photograph.

Pair Tour Companion, then begin.

Pair Tour Companion before commentary. Connect to the current XE300 Wi-Fi, then tap “Pair Tour Companion”. Device setup and ports stay in the device guide.

The backgrounds are brand atmosphere, not licensed destination photography, and they do not represent a real tour.

Step 1 / 4

Turn the device on and join its Wi-Fi

Turn on the Tour Companion device. Connect the phone to the current XE300 Wi-Fi, and allow the Wi-Fi permission the App asks for.

The most important point in this step

If you are not connected, the App asks you to join the current XE300 Wi-Fi and pair again. “Start WiFi Test” is not formal pairing.

How it works

  • Turn on the device
  • Join the current XE300 Wi-Fi
  • Allow the Wi-Fi permission

Step 2 / 4

Tap “Pair Tour Companion”

On Me, or from the pairing entry in the live console, tap “Pair Tour Companion”, then choose the assigned tour.

The most important point in this step

After a successful pairing, you do not repeat this for the same tour. If commentary is playing, pause or end it before you pair.

How it works · not an actual App screenMePair Tour Companion

Step 3 / 4

Wait until “Tour Companion is ready”

While pairing, the App shows “Pairing Tour Companion” and “Pairing usually takes about 3 minutes.” Begin commentary only after “Tour Companion is ready”. Pairing changes the XE300 Wi-Fi name to that tour’s tour number.

The most important point in this step

“Pairing usually takes about 3 minutes.” is an estimate, not a guarantee. Wait for “Tour Companion is ready”.

How it works

  • Pairing Tour Companion
  • Pairing usually takes about 3 minutes.
  • Tour Companion is ready

Step 4 / 4

If pairing fails, follow the prompt

If pairing fails, tap “Try again” or “Cancel” as the App asks. If the phone is not on Wi-Fi, connect to the current XE300 Wi-Fi and pair again.

The most important point in this step

Pairing is refused while Wi-Fi Test is ready. That path is for engineering, not this tutorial.

How it works · not an actual App screenTry againCancel
Brand atmosphere: open water, suggesting commentary on the road. Not a route photograph.

On the road, watch the group from the console.

Open the live console. Travelers who signed in with the agency QR and are listening normally do not each need to scan the guide QR. Your own play screen cannot replace a check on a traveler’s phone.

The backgrounds are brand atmosphere, not licensed destination photography, and they do not represent a real tour.

Step 1 / 4

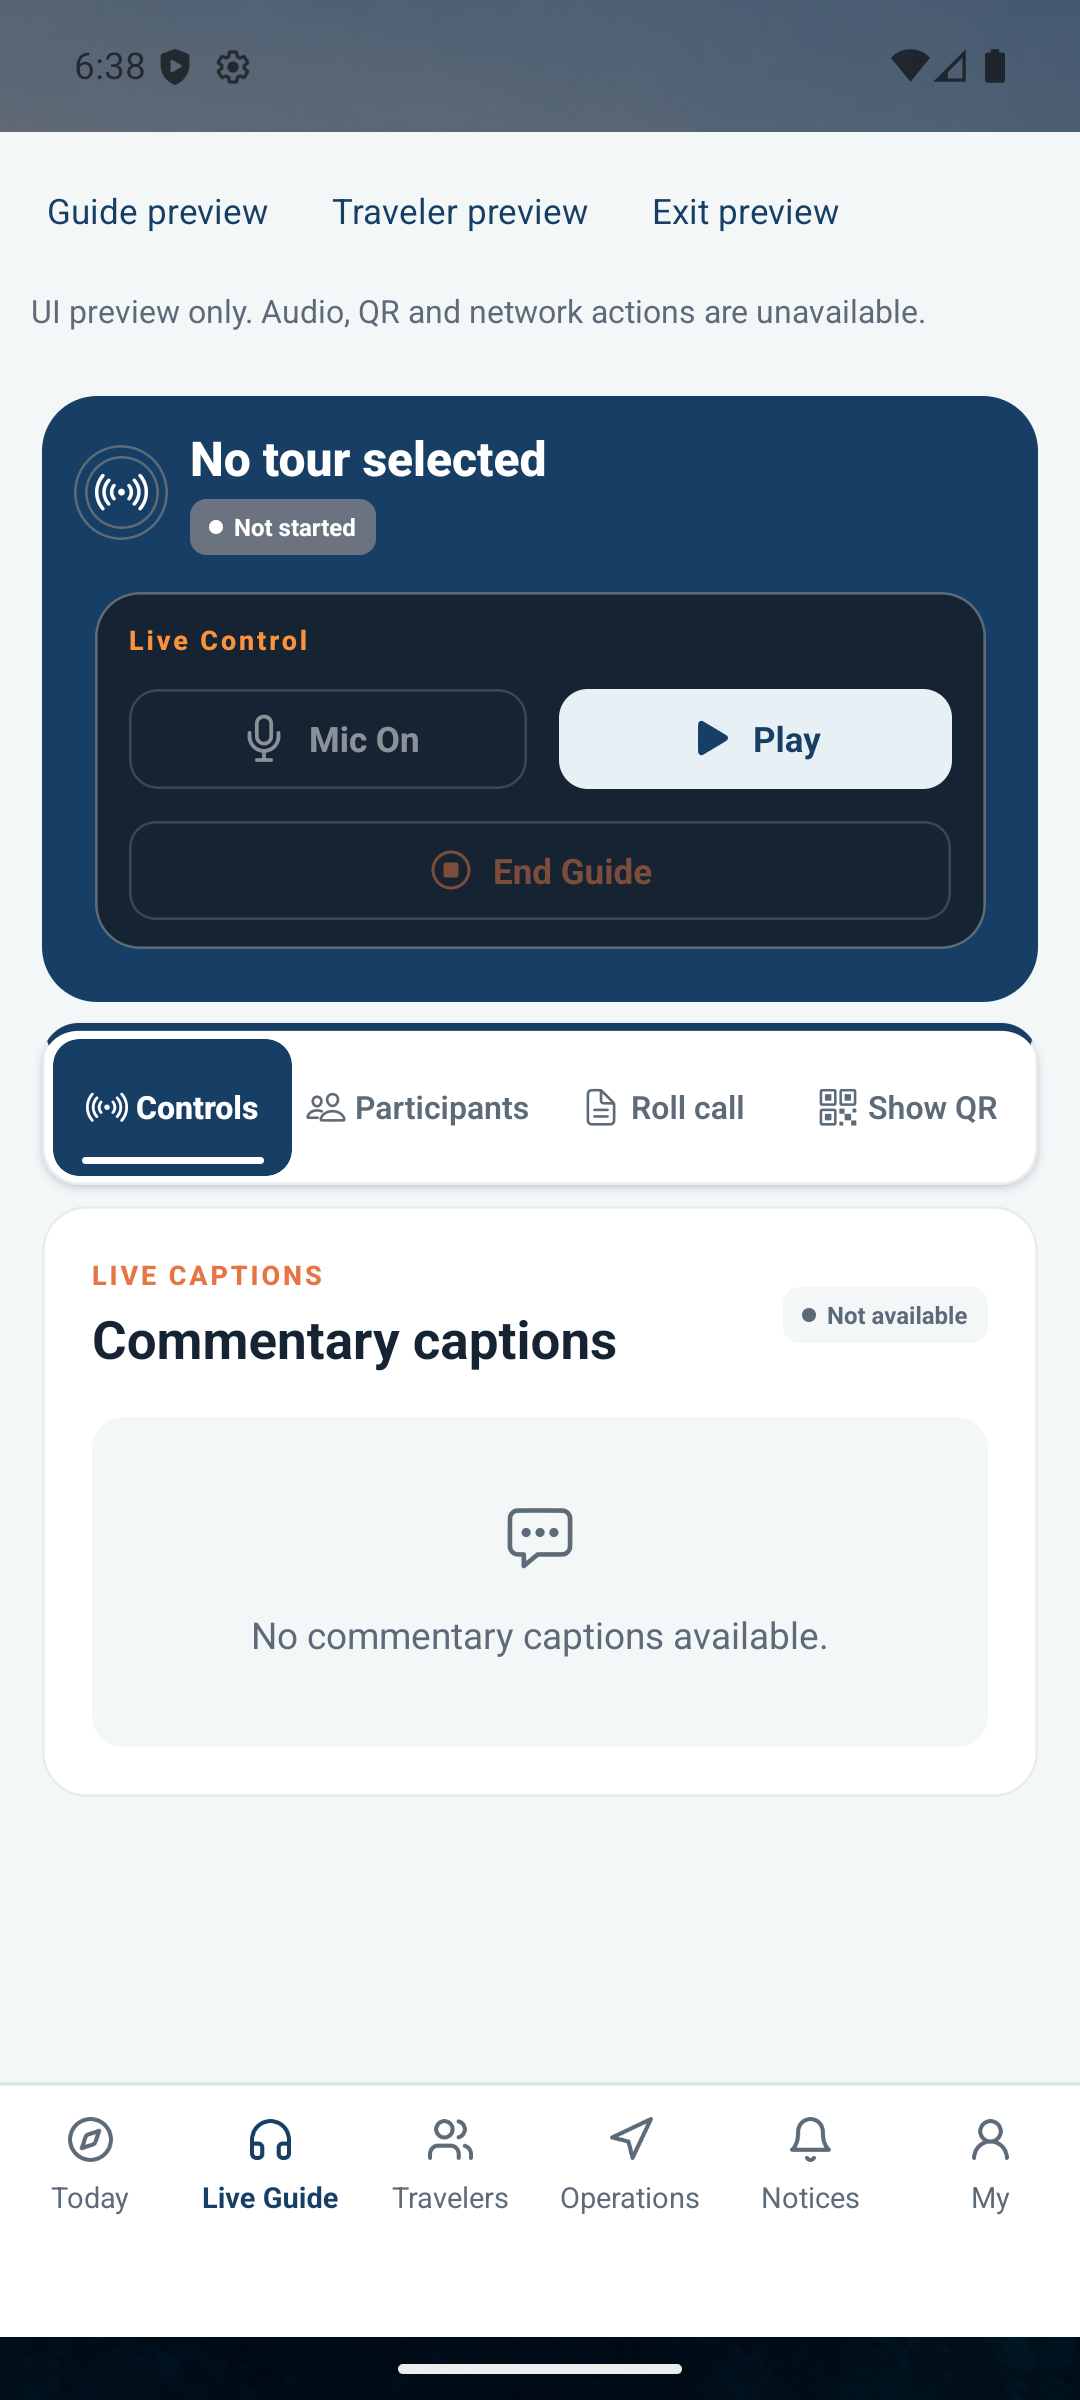
Controls

On Controls, use “Play” and “Pause”, and “Mic On” or “Mic Muted”. When this commentary should stop, tap “End Guide”.

The most important point in this step

Ask at least one traveler to confirm the sound on their own phone. The preview below has not started, so it is not a commentary already under way.

Development preview of the live-control tab, showing the microphone and nearby controls
Development preview · English App screen. It only shows where live control and the microphone sit, and does not mean commentary has started.

Step 2 / 4

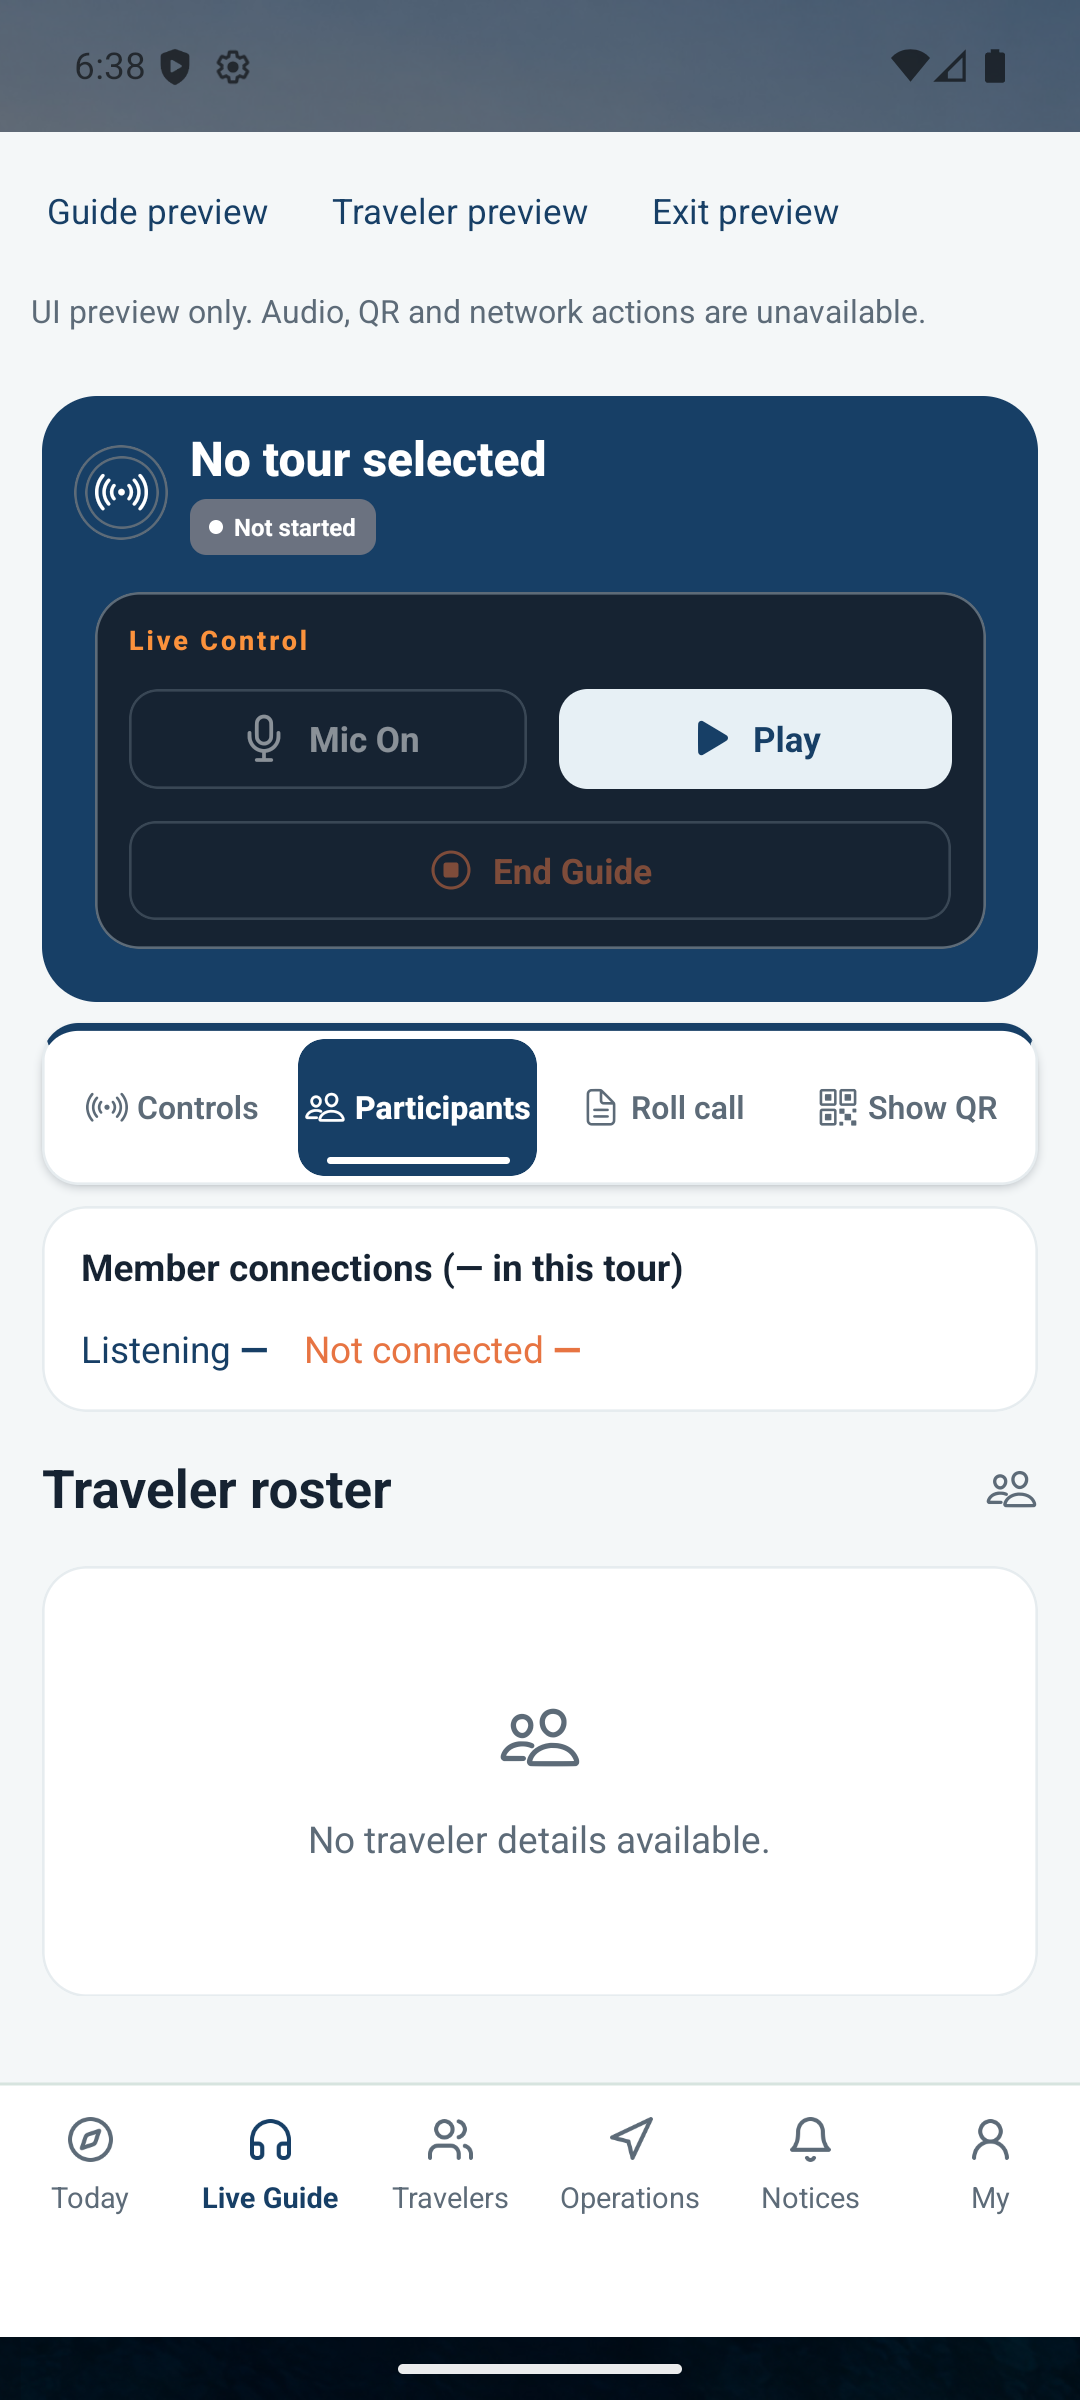
Participants

On Participants, look at the people shown now and whether they are listening or not connected. This is the connection at this moment.

The most important point in this step

An empty list only means there is no participant information to show. The development preview is not a real group.

Development preview of the participants tab, showing an empty participant list
Development preview · English App screen. It only shows where the participant list sits, and does not mean real participants are online.

Step 3 / 4

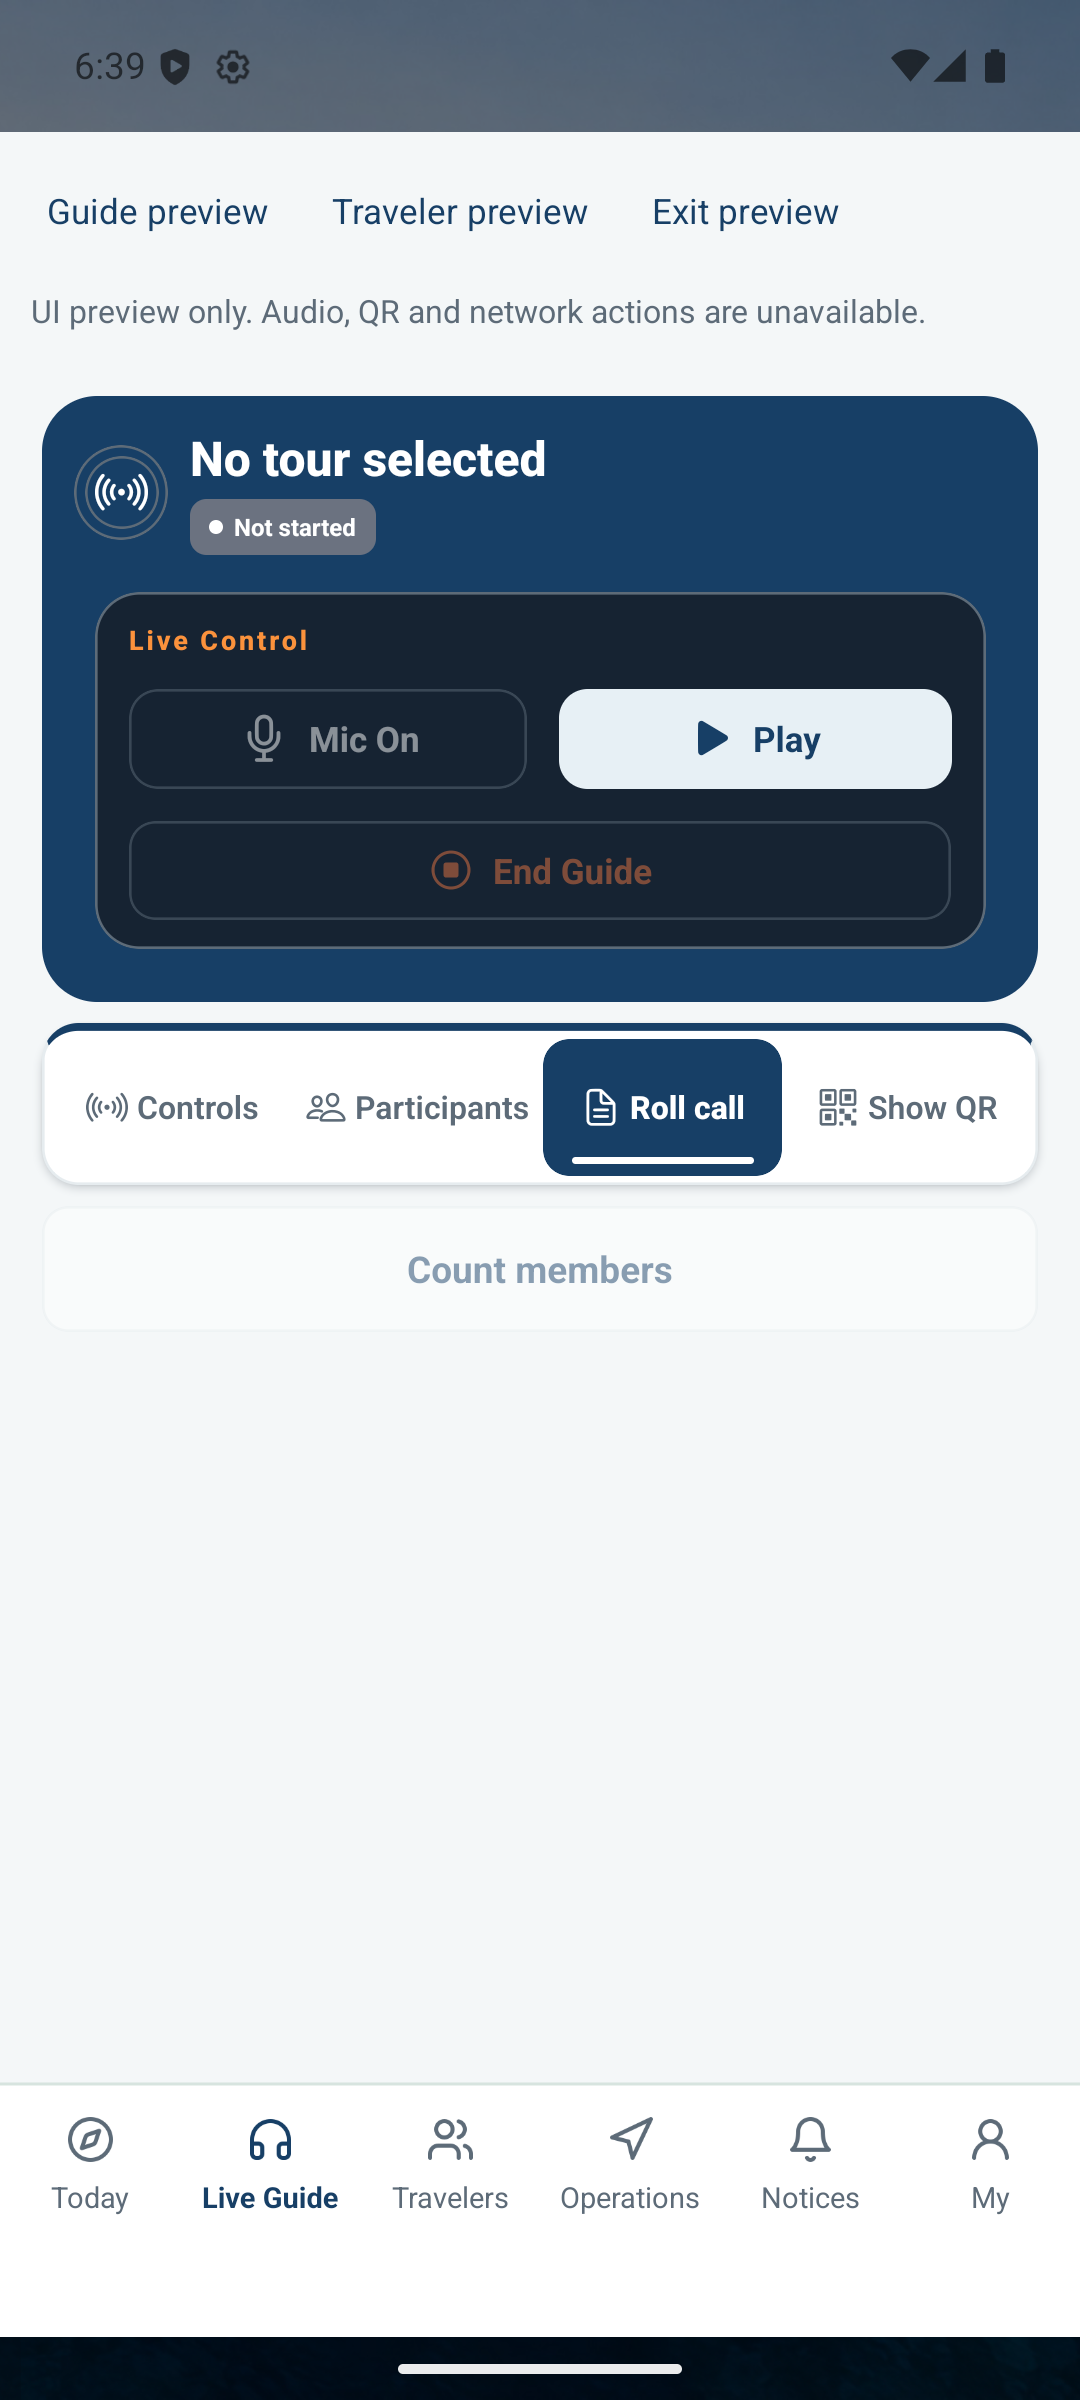
Roll call

On Roll call, tap “Count members” to see who is connected and who is not. You can count again to look at the current numbers once more.

The most important point in this step

This is the connection right now. It does not save an attendance record. The preview below has not completed a roll call.

Development preview of the roll-call tab, showing where the roll-call action sits
Development preview · English App screen. It only shows where roll call sits, and does not mean roll call is complete.

Step 4 / 4

Show QR only as a backup

Show QR is mainly for travelers whose usual connection cannot be used. Travelers who are already bound and listening normally do not each need to scan. A completed scan only means the QR was read. It does not mean they are connected or listening.

The most important point in this step

The current App does not lock Show QR when a traveler’s connection fails. You can open the tab after pairing, while your Guide identity is valid. A real QR appears only when the live session is ready. Until then the App says “Start Live Guide to display the existing session QR.” This page does not show a scannable QR. Captions say “No commentary captions available.” Chapter upload is not connected either, so neither can be operated yet.

How it works

  • Show QR
  • Backup when the usual connection cannot be used
  • No scannable QR here

This tab is where the listening QR for this commentary is shown. The development preview QR is blank, so this page explains it in text and does not include that image.

Brand atmosphere: a warm street, suggesting the group stays with the journey after this commentary. Not a destination photograph.

Ending this commentary leaves the journey in place.

“End Guide” ends only this commentary and keeps the same tour’s network. If listening stops, check the network, the volume and the console before anything else. The backup QR does not replace those checks.

The backgrounds are brand atmosphere, not licensed destination photography, and they do not represent a real tour.

Step 1 / 4

Tap “End Guide”

When this commentary is over, tap “End Guide”. It ends only this segment and keeps the same tour’s network. Travelers can stay in the journey and wait for the next segment.

The most important point in this step

A sudden silence does not always mean you ended the commentary. Look first at whether the console is still playing.

How it works

  • End Guide
  • This segment only
  • The same tour’s network stays

Step 2 / 4

Leaving the tour and signing out are separate

A traveler’s “Leave Session” stops this listen. “Leave Tour” leaves the saved journey. “Sign out” ends this sign-in. None of these is “End Guide”.

The most important point in this step

Sign out only when you want to end your own Guide sign-in. It does not replace “End Guide”, and it does not create or cancel an assignment.

How it works · not an actual App screenEnd GuideLeave SessionLeave TourSign out

Step 3 / 4

If listening stops, check these three things

See whether the phone is still on that tour’s Wi-Fi, whether the traveler’s volume and speaker are on, and whether the console is still playing.

The most important point in this step

The backup QR does not replace these checks. Use the on-site QR only when the usual way of listening cannot be used.

How it works

  • That tour’s Wi-Fi
  • Volume and speaker
  • Whether the console is still playing

Step 4 / 4

Pairing problems follow the App prompt

If pairing has not finished, confirm the phone is on the current XE300 Wi-Fi, then tap “Try again” or “Cancel”.

The most important point in this step

Do not treat about three minutes as a promise of success. Wait for “Tour Companion is ready”, or follow the App’s failure prompt.

How it works · not an actual App screenCheck Wi-FiTry again or Cancel

This is a website tutorial. It does not scan QR codes, connect to WiFi, or transmit audio. Follow the App and your phone’s actual status.

View the original App images

Localized original emulator screenshots are entry/status references only, not evidence that this step was completed.